Simple photo-landscape
Depth effect
Cropping
Share
 |
 |
 |
Before you begin
Photo-landscape is a landscape for YoWindow, made from a regular photograph.
This tutorial is for anyone who want to make quality photo-landscapes.
Make sure you have installed the latest version of YoWindow Weather from Google Play.
We expect you to have the following skills.
- Can cut out objects from a photo in Photoshop (or any other graphical editor).
- To understand JSON data format (it's simple, but anyway).
- To be able to upload files to Android device from your PC or Mac.
Simple photo-landscape
A landscape is made of several files packed into ZIP archive with .yla extension ("yla" means YoWindow Landscape).
The files are the following.
- landscape.ywlj - the manifest. A text file in JSON format. It describes the structure and the properties of the landscape.
- photo.jpg - the source photo.
- mask.png - the mask of the sky, cut out of the photo.
- depth_map.jpg - the depth map.
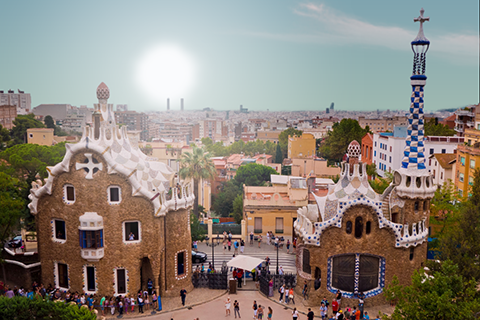
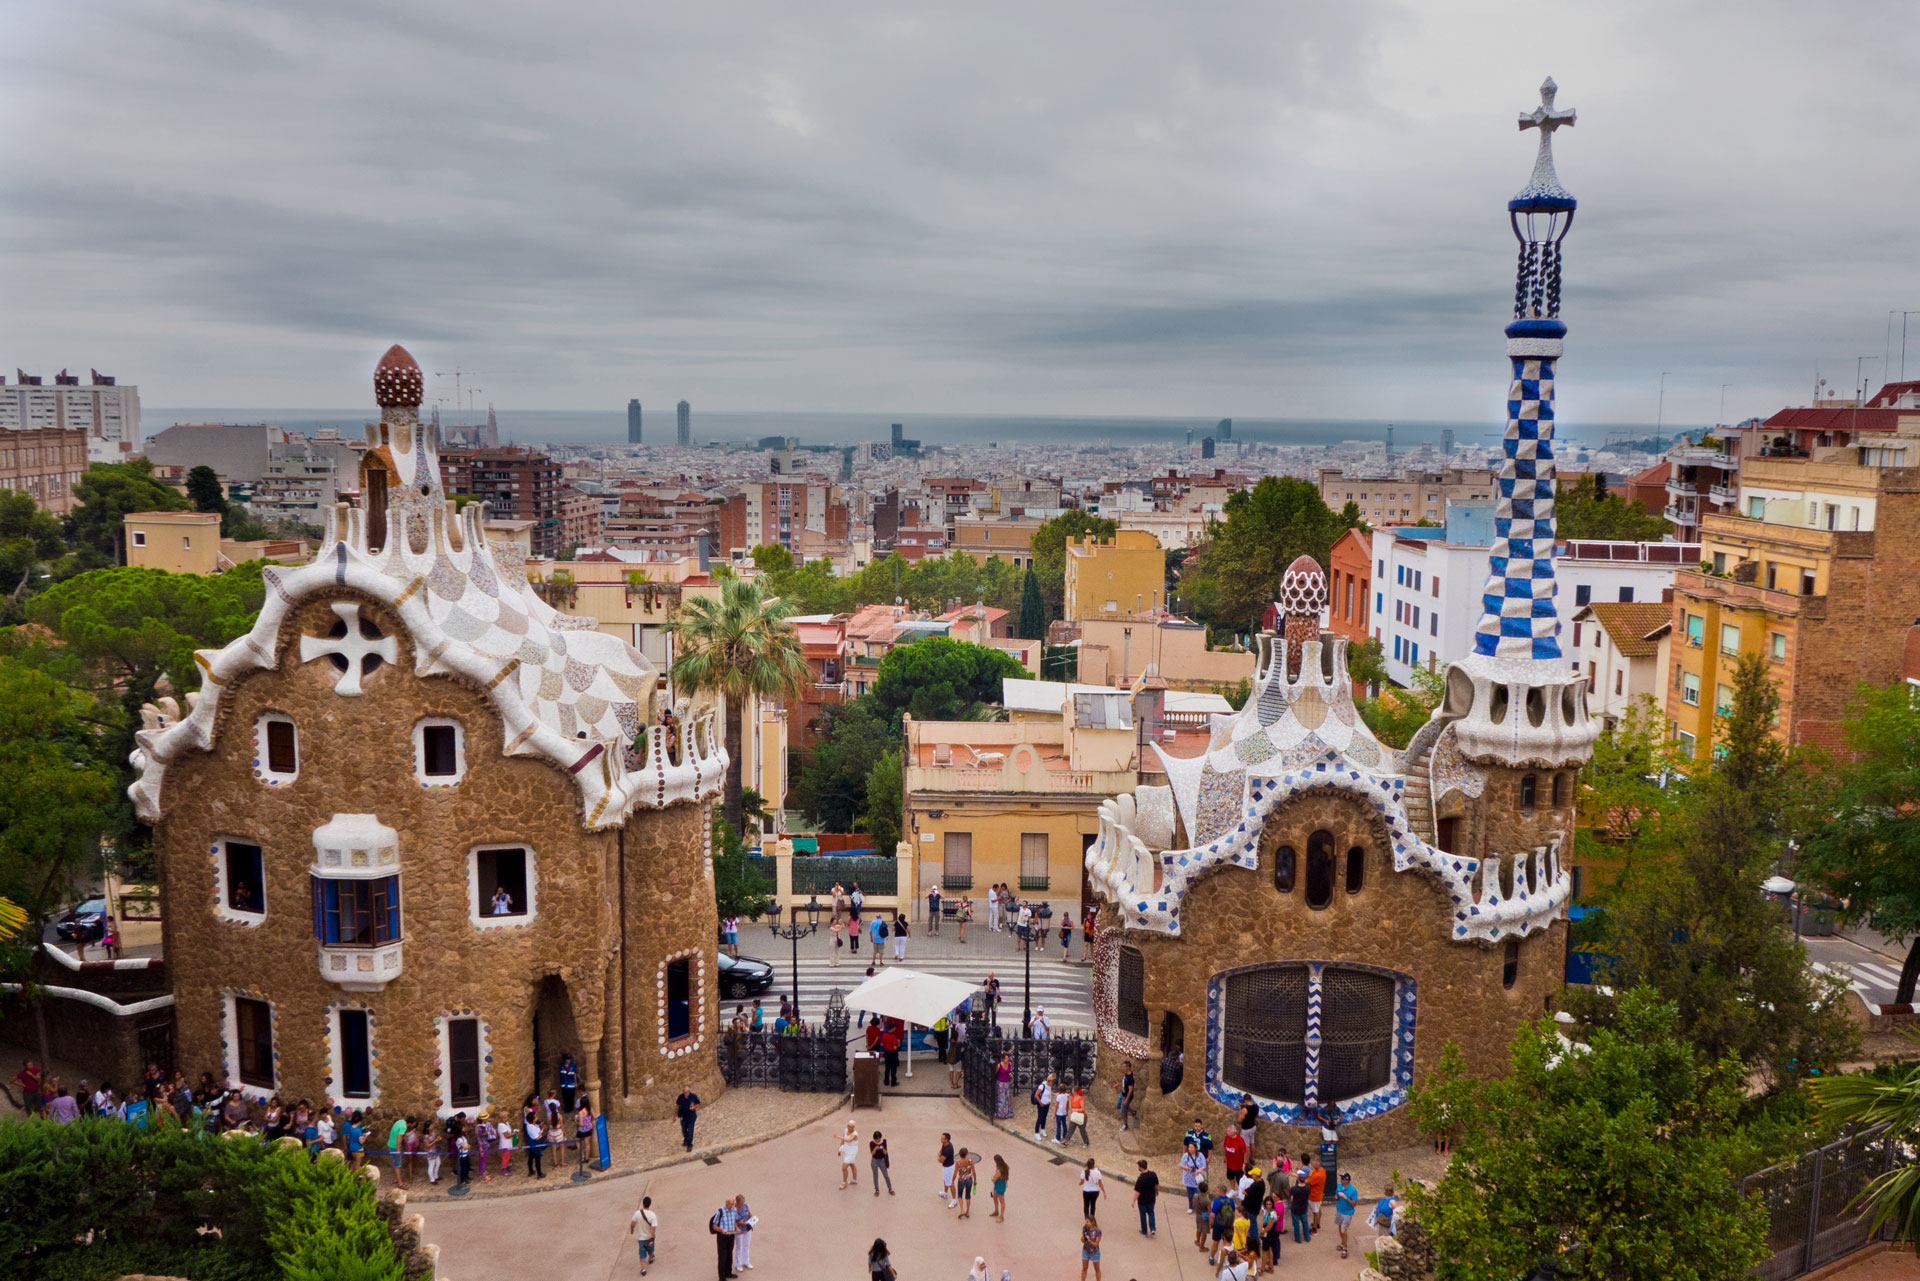
Find a good photo for the landscape
- Sunny day. If the source photo is taken on a sunny day, the landscape to look perfect in the day, in the night and under any weather condition,
-
Impressive angle. Top landscapes are made from panoramic photos, taken from high point.
-
Avoid large objects touching the top border of the photo (houses, trees). YoWindow is filling the empty space above the top edge of the photo with the sky. These objects to look unnaturally cut on top.
-
Prefer the shots taken in landscape orientation (horizontally).
- Choose high resolution photos. The preferred width is around 1920 pixels. Low resolution photos to look poor on contemporary screens of phones and tablets.
Resize huge photos
In a case the photo is very big, resize it to a reasonable size. We advise a width of 1920 pixels. Otherwise you may experience the landscape to open slowly in YoWindow.
Rename the photo to "photo.jpg"
Save the photo to a file with “photo.jpg” name. All the letters must be lowercase. This is important. Otherwise you won't be able to open the landscape on Android. Remember, all the file names of the landscape must be typed in lowercase.
Cut the sky out of the photo
To make the sky of a regular photo to become live and to reflect the weather, one needs to tell the app where the sky is on the photo.
For this purpose, the area of the sky is cut out in a graphical editor.
The cut out is called “Mask”. The Mask - is an image of the same size as the photo. The area of the sky is opaque and the rest of the image is transparent.
You need to save the Mask in PNG format to a file with “mask.png” name. All the letters are in lowercase.
YoWindow to fill the live sky in the area of the photo specified by the Mask.
 |
 |
 |
| Photo | Mask | YoWindow |
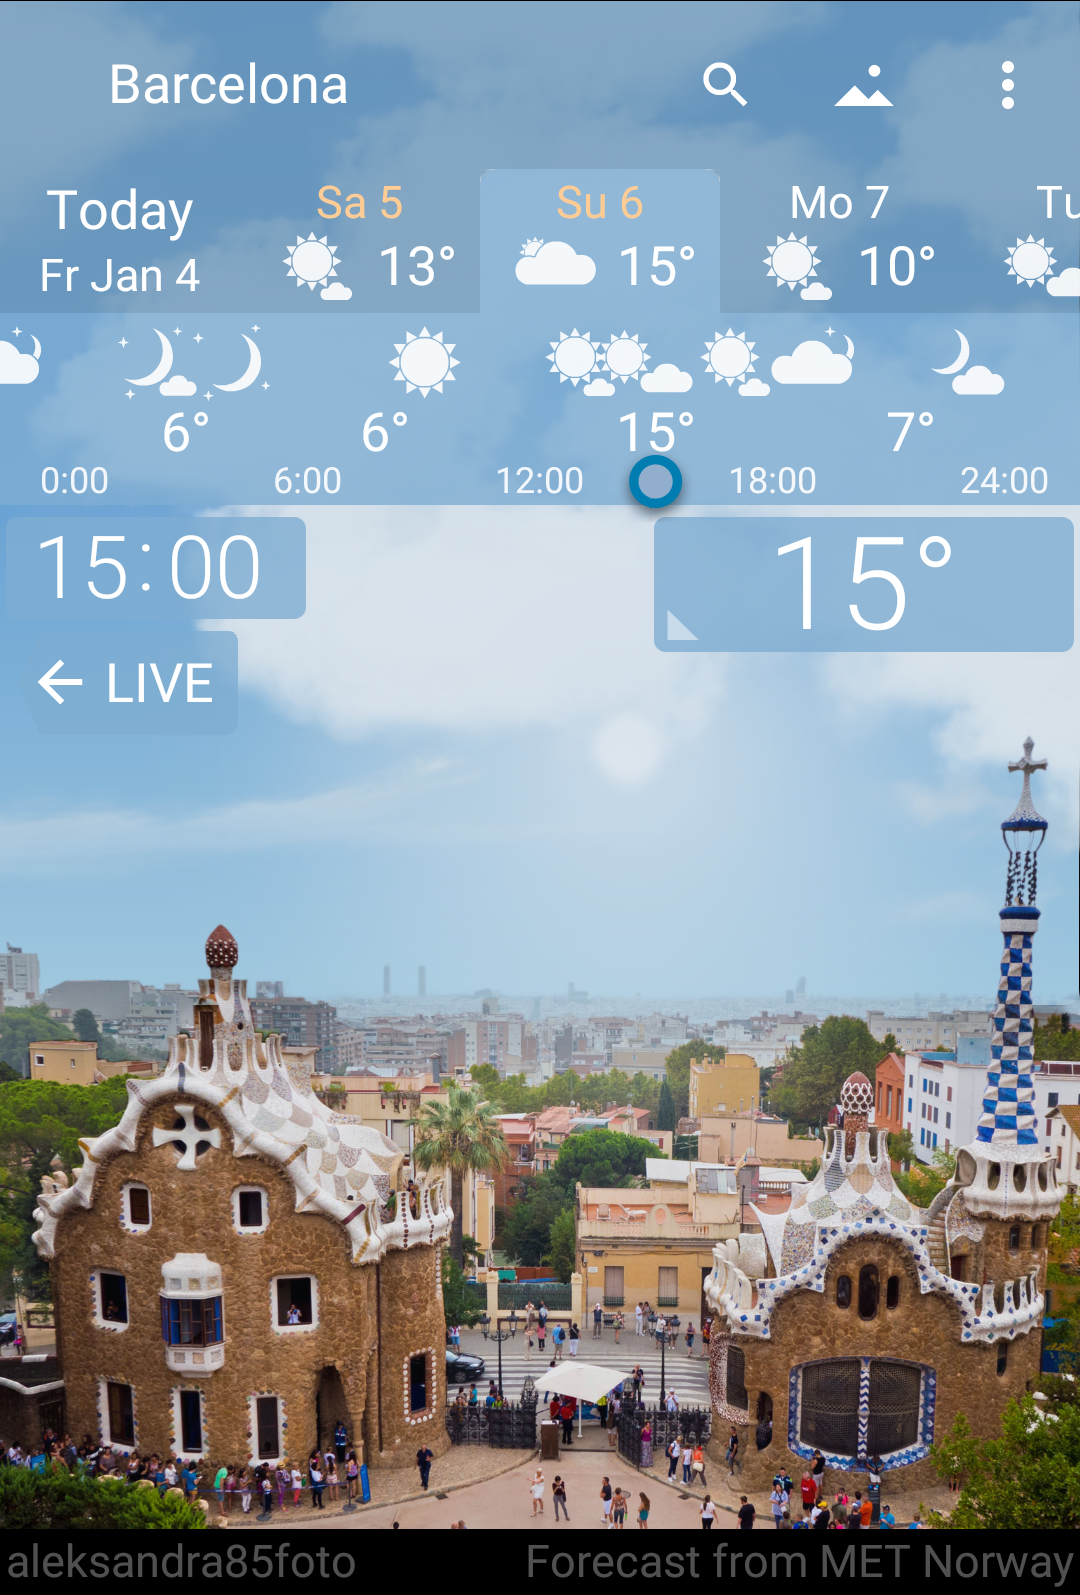
Locate the horizon level on the photo
The horizon level is a distance in pixels from the top border of the photo to the level where the Sun is going to set and the sky ends. Usually this is the very bottom point of the sky. But one can set any level.

Photoshop. Hover the cursor over the place where the sky ends. In "Info" panel of Photoshop the Y coordinate is the horizon level.
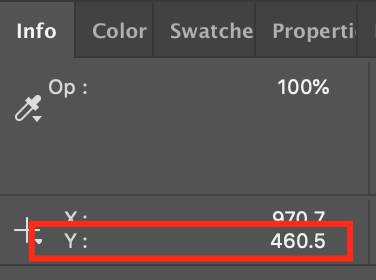
In our example, horizon-level is equal to 460 pixels.
Create Manifest file
In a text editor (Notepad) create Manifest file “landscape.ywlj” All the letters are lowercase.
The Manifest - is a text file in JSON format.
|
{
"name": "Park Guel panorama",
}"photoAuthor": "aleksandra85foto", "photoUrl": "https://pixabay.com/en/barcelona-spain-city-park-488052/", "photoSource":"Found on Internet", "horizonLevel":460 |
-
name - landscape name
-
photoAuthor - author of the photo, displayed in the bottom left corner of YoWindow
-
photoUrl - a link to the original photo. When the user taps the author name, YoWindow navigates to this page.
-
photoSource - where have you found the photo. If you made the photo or found on the Internet or whatever.
-
horizonLevel - The distance in pixels from the top of the photo the point where the Sun sets.
-
landscape.ywlj - manifest
-
photo.jpg - photograph
-
mask.png - sky mask
Pack the files into .zip archive
Give a proper name to the archive.
Let's name it "park_guell.zip"
Change the landscape extension to ".yla"
Change the extention of ".zip" file to ".yla"
park_guell.yla
That's it. The landscape is done!
Send the landscape to Android
Upload the landscape (.yla file) to Android device.
Open the landscape in YoWindow
-
Launch YoWindow
-
Open Landscape Drawer.
-
Tap plus “+” button
-
Tap "Folder" button.
- Find the landscape file on disk (park_guell.yla) and open it.
 |
 |
|
| Overcast | Clear | Sunset |
Looks good!
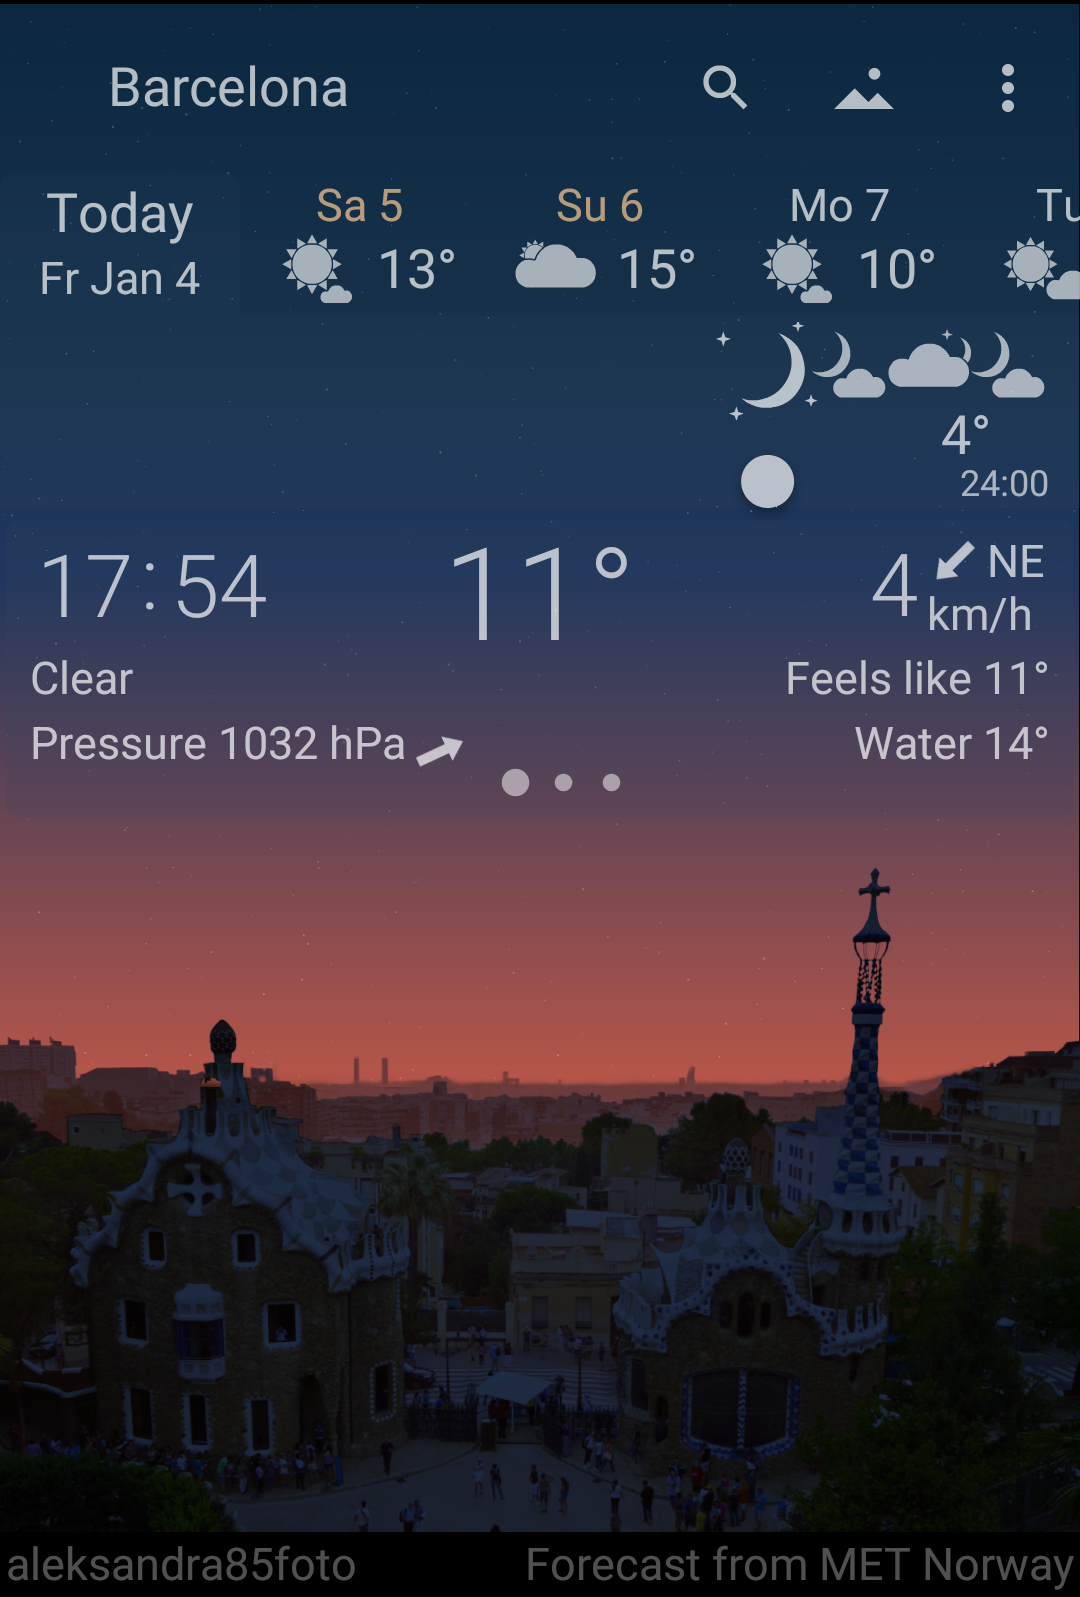
Depth effect
The depth effect adds a sense of perspective to photos.
The effect is important for photos taken from a high point. The photo to look amazing at Sunset, in the rain, when it's clear or overcast and especially good in a foggy day.
To add the depth to the landscape one needs to create a special image called "Depth Map". This image encodes distance to objects on the photo with colors from black to white. The closer an object, the darker its area in Depth Map, the farther an object - the lighter its area.
Save Depth Map in JPEG format to a file with “depth_map.jpg” name.
 |
| Depth map. Dark areas are closer, light areas - farther. |
After Depth Map is drawn, you need to provide object distances. Specify distances to the closest black area and the farthest white area in Manifest (landscape.ywlj). YoWindow to determine other distances automatically for the other shades of gray. You don't need to be precise. Set approximate distances.
|
"depthMap": {
"nearMeters": [a distance to the black (closest) area in meters]
}"farMeters": [a distance to the white (farthest) area in meters] |
Example Manifest (landscape.ywlj) with depthMap parameters provided.
|
{
"name": "Park Guel panorama",
}"photoAuthor": "aleksandra85foto", "photoUrl": "https://pixabay.com/en/barcelona-spain-city-park-488052/", "photoSource":"Found on Internet", "horizonLevel":460, "depthMap": {
"nearMeters": 50,
}
"farMeters": 8000 |
|
Advanced. For panoramic landscapes you can make the horizon area to look impressive by providing the distance to the horizon area. Parameters. "horizonStartDepth" - pixel intensity of the beginning of "horizon area" in Depth Map [0..1]. horizonStartDepth intensity mapped to farMeters. "horizonMeters" - the distance to the end of "horizon area". Mapped to pixel intensity of 1 in Depth Map. The distances are computed from pixel intensities of Depth Map this way. "depthMap": {
"nearMeters": 100,
"farMeters": 2500,
"horizonStartDepth": 0.70,
"horizonMeters": 15000
} |
Now you should have four files.
-
landscape.ywlj - Manifest
-
photo.jpg - photo
-
mask.png - sky mask
-
depth_map.jpg - Depth Map
Pack the files into .zip archive.
Rename ".zip" extension to ".yla"
park_guell.yla
Upload the landscape file to Android device and open the landscape in YoWindow.
Congratulations! You have a landscape with a perspective view!
|
 |
| Simple landscape | Landscape with Depth Map |
It is important to draw Depth Map correctly. There is a special tool in YoWindow for checking Depth Maps. You can see how your landscape looks in a fog of various density.
Here's how to use this tool.
First, enter Debug mode.
-
Go to "YoWindow Settings/About".
-
Scroll About page to the very bottom.
-
There is a small “Debug mode” button, tap it.
Now add Visibility slider to the screen.
-
Go to "YoWindow Settings/Debug"
-
Turn Visibility option on.
-
Close Settings.
-
Visibility slider to appear on the screen.
The slider modifies the visibility - the distance where you can't recognize objects at because of fog.
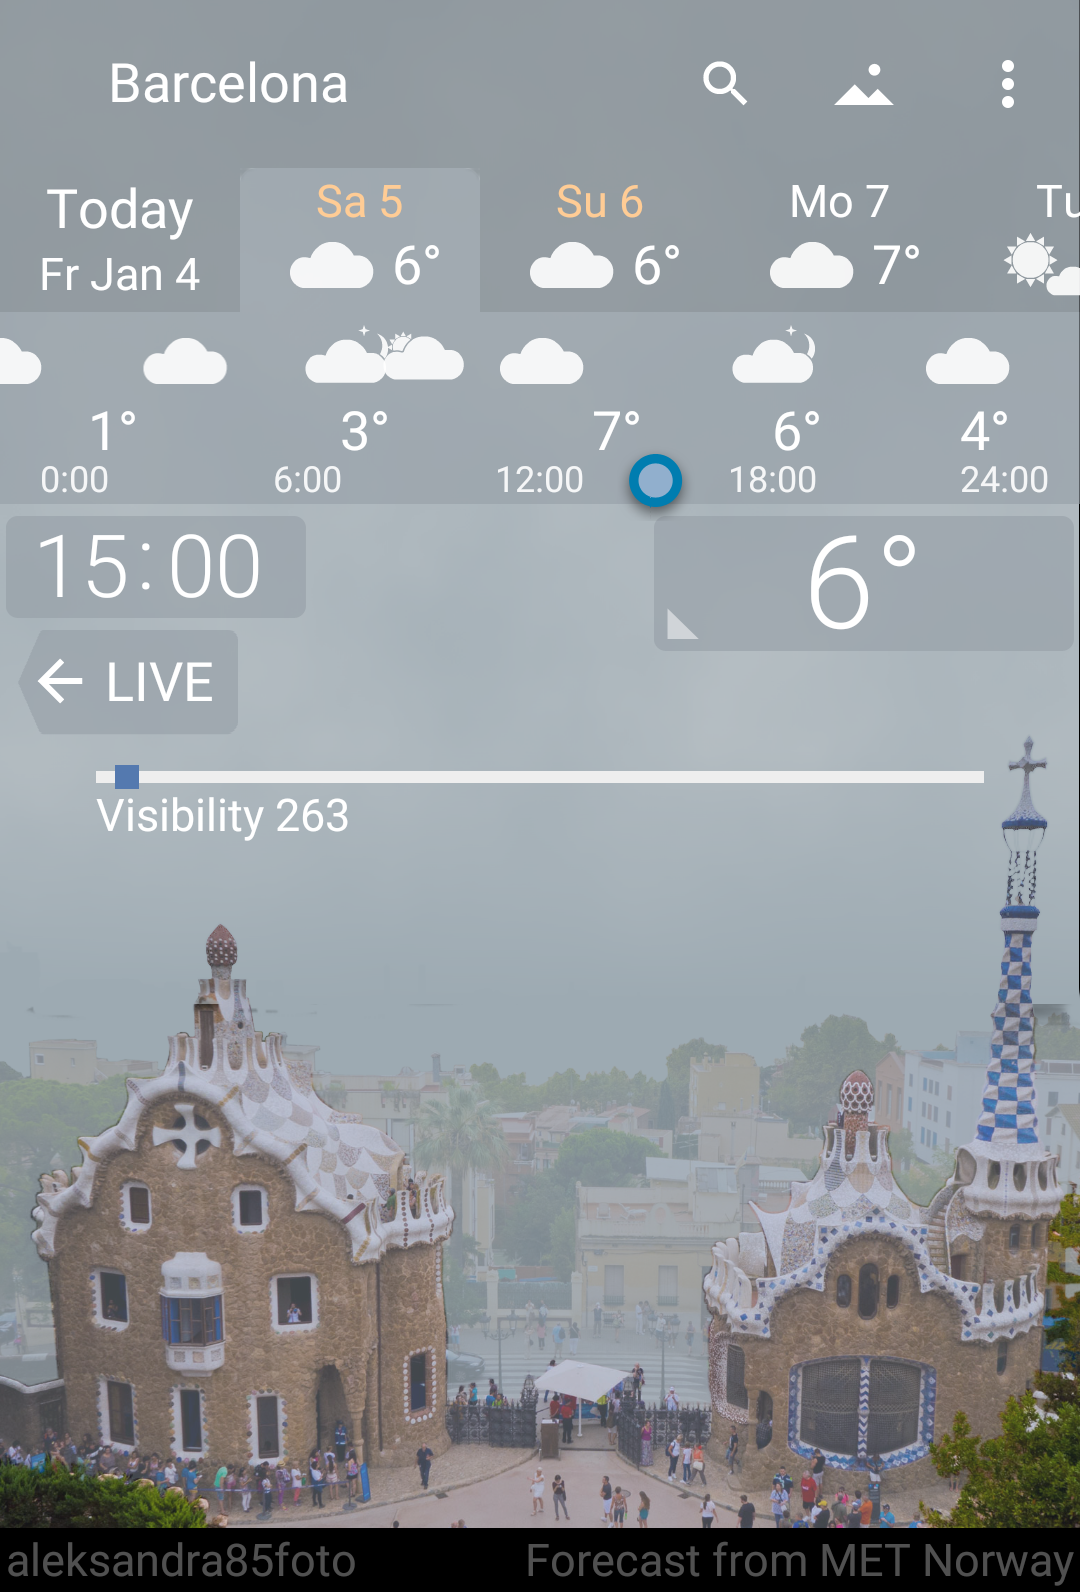
Always check your Depth Map with this tool.
Cropping
By default, the photo is displayed on the screen in a trivial way. The bottom edge of the photo touching the bottom edge of the screen. Left and right photo edges touch left and right screen edges respectively.
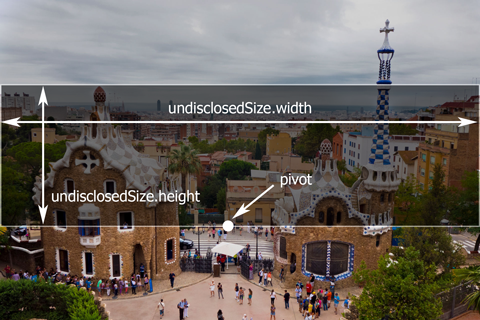
To achive the best visual effect, you can define a rectangular area of the photo we call "Crop Frame".
YoWindow to zoom into Crop Frame, while avoiding this area to be covered by user interface elements.
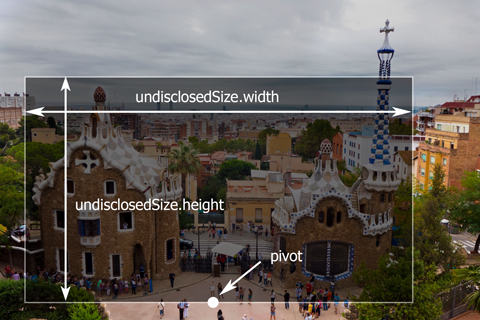 |
| Gray rectangle is Crop Frame. pivot - Pivot Point. |
There's an important point located at the bottom edge of Crop Frame, right in the middle. We call this point a “Pivot”.
The landscape is laid out this way.
- The photo is positioned so that Pivot Point is located right in the middle of the bottom edge of the screen. Think of it as though photo is nailed through Pivot Point to the bottom edge of the screen, right in the middle.
- Then the photo is scaled to make Crop Frame fit the screen. At the same time the app is trying to avoid Crop Frame to touch user interface elements.
Photoshop. Hover the cursor over Pivot Point. Inside Info panel you to see its X and Y coordinates.
Use "Ruler" tool to measure width and height of CropFrame.
|
"portrait": {
"pivot": {
}
"x":852,
}"y":1206 "undisclosedSize": {
"width":1539,
}
"height":900 |
-
portrait - means Crop Frame defined for portrait (vertical) orientation of the device.
-
pivot - Pivot Point
-
undisclosedSize - the size of Crop Frame - the area that is not disclosed by the screen or the user interface.
-
width - Crop Frame width
-
height - Crop Frame height
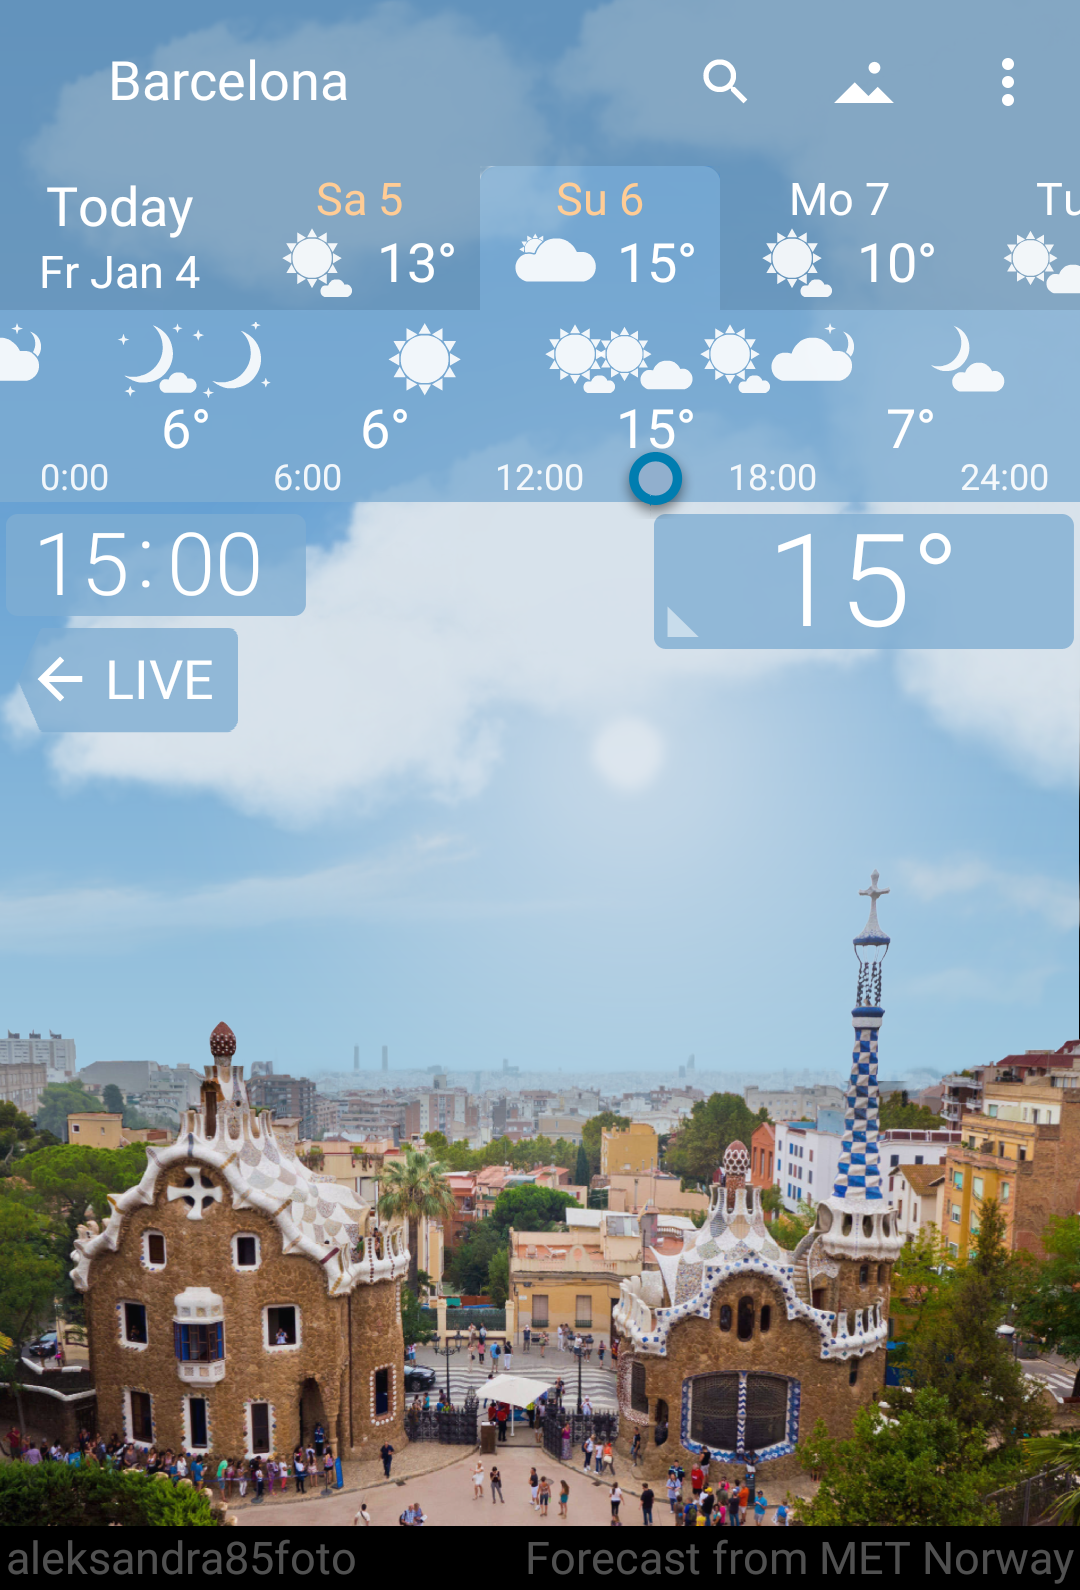 |
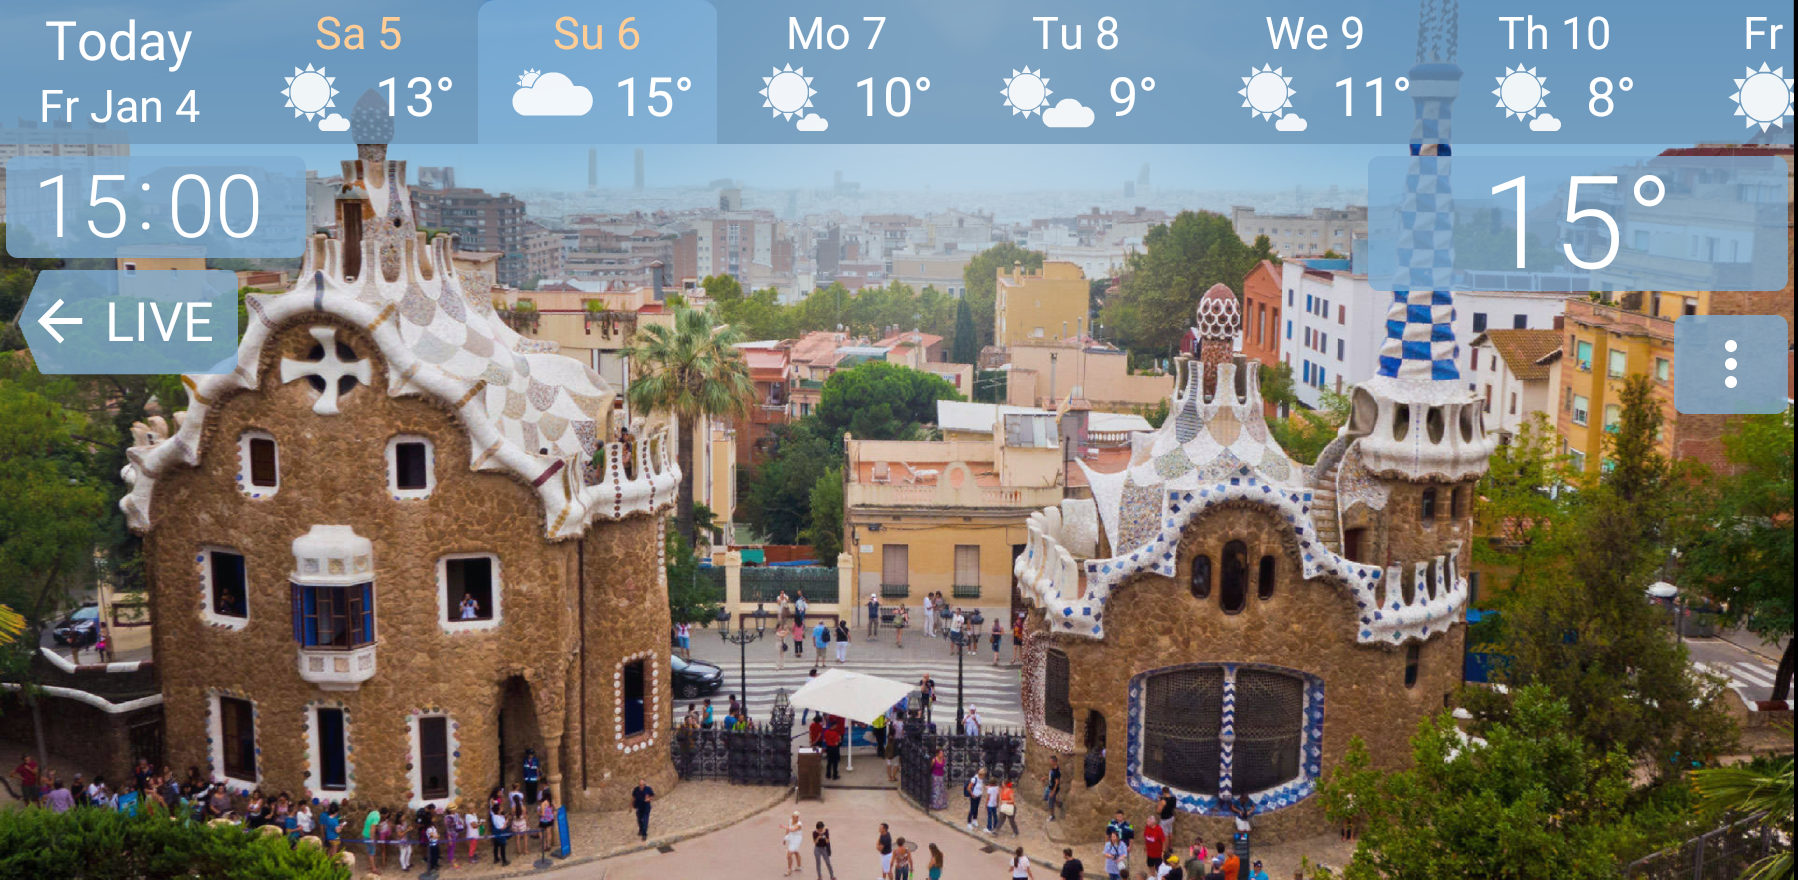
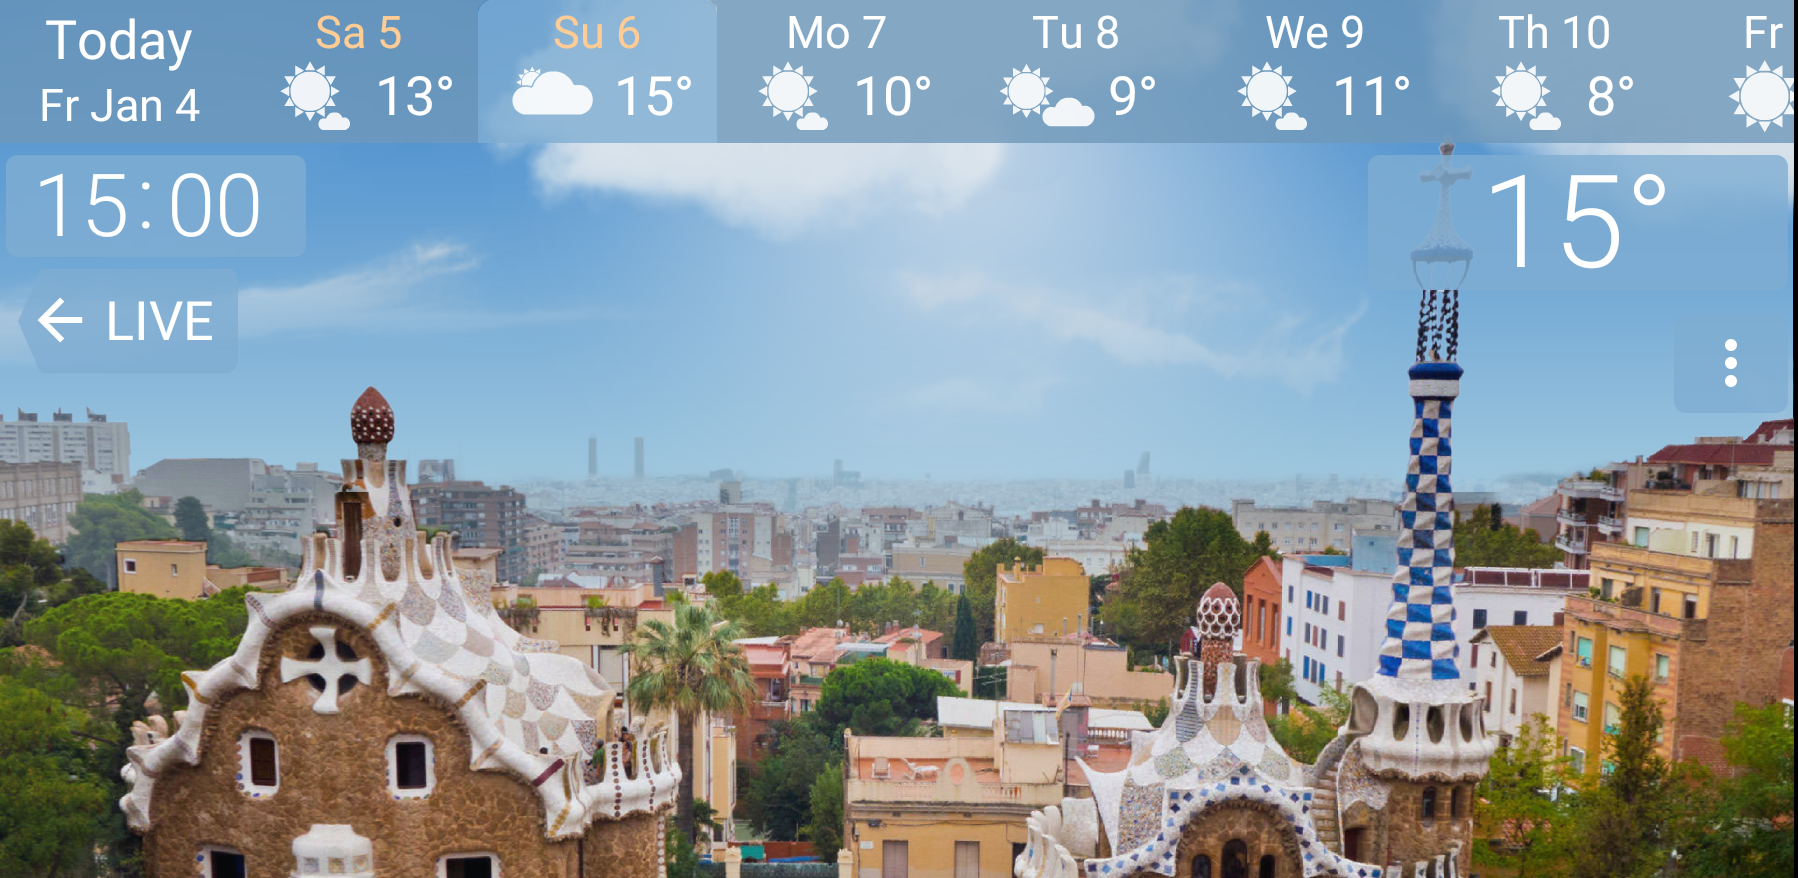
 |
| Before cropping | Cropped landscape |
Crop Frame is defined respectively for portrait (vertical) and for landscape (horizontal) device orientation.
There is a lack of space on phones in landscape orientation. It's essential to provide cropping for most landscapes. Otherwise the sky may be missing.
Let's define Crop Frame for landscape orientation.
|
"landscape": {
"pivot": {
}
"x":912,
}"y":906 "undisclosedSize": {
"width":1920,
}
"height":564 |
-
landscape - means Crop Frame defined for a landscape (horizontal) orientation of the device.
Landscape orientation cropping.
 |
 |
| Before cropping | Cropped landscape |
Here's Manifest (landscape.ywlj) after the cropping was set up.
|
{
"name":"Park Guel panorama",
}"photoAuthor":"aleksandra85foto", "photoUrl":"https://pixabay.com/en/barcelona-spain-city-park-488052/", "photoSource":"Found on Internet", "horizonLevel":460, "portrait": {
"pivot": {
},
"x":852,
}"y":1206 "undisclosedSize": {
"width":1539,
}
"height":900 "landscape": {
"pivot": {
}
"x":912,
}"y":906 "undisclosedSize": {
"width":1920,
}
"height":564 |
Pack all the files of the landscape into .zip archive.
Rename ".zip" extension to ".yla"
park_guell.yla
Upload the landscape file to Android device and open the landscape in YoWindow.
Now the landscape looks nice on any phone or tablet.
Night view
If you have a night photo for your landscape, that's awesome! YoWindow to show the night photo when it's getting dark.
 |
| Night |
How to add a night view.
-
From the night photo make the same set of graphical files you made for the landscape - photo, mask, depth map.
Add "night_" prefix to the file names
night_photo.jpg
night_mask.png
night_depth_map.jpg
Put the files in the landscape folder.
-
Add night view information to Manifest landscape.ywlj
You need to add "views" node.
Inside "views" a set of "view" nodes to be put.
Put square brackets around view list.
So far there's only one view - night.
view is wrapped with curvy braces {}.
"views": [
   {
	"id": "night",
	"name":"Night",
	"photoAuthor":"Lukasz Szwaj",
	"photoUrl":"",
	"entrance":"instant",
	"horizonLevel":460,
	"depthMap": {
		"nearMeters": 20,
		"farMeters": 5000
	}
}],
-
id - defines when the view to be displayed
- "night" - When it's getting dark
-
entrance - defines how fast the view to be revealed.
- "instant" - day and night switch instantly.
- "delayed" - night view displayed with a delay. Use this option if you have different views for the day and night scenes.
The rest of the paramters work exactly as they do for the landscape (photoUrl, horizonLevel, depthMap)
Manifest landscape.ywlj with night view.
{
	"name":"Park Guel panorama",
	"photoAuthor":"aleksandra85foto",
	"photoUrl":"https://pixabay.com/en/barcelona-spain-city-park-488052/",
	"photoSource":"Found on Internet",
	"horizonLevel":460,
	"portrait": {
		"pivot": {
			"x":852,
			"y":1206
		},
		"undisclosedSize": {
			"width":1539,
			"height":900
		}
	},
	"landscape": {
		"pivot": {
			"x":912,
			"y":906
		},
		"undisclosedSize": {
			"width":1920,
			"height":564
		}
	},
	"views": [
		{
			"id": "night",
			"name":"Night",
			"photoAuthor":"Lukasz Szwaj",
			"photoUrl":"",
			"entrance":"instant",
			"horizonLevel":460,
			"depthMap": {
				"nearMeters": 50,
				"farMeters": 5000
			}
		}
	]
}
|
The landscape with the night view.
park_guell_night.yla
Share
We hope this tutorial to inspire you to create beautiful landscapes.
We would love to see your work.
Send us your landscape support@repkasoft.com
Share your landscape with the community on YoWindow Forum.
Or YoWindow community on Reddit. :-)
YoWindow Team.
